Staging the Try-on Table: How Mirrors, Trays and Lighting Work Together试戴台的道具布局:镜子、托盘与灯光怎么配合
The try-on session is the most critical few minutes at a jewelry counter. A customer sits down, picks up a ring, necklace or pair of earrings, and inspects in the mirror for a moment; those minutes often decide whether the sale closes. The three most-used props on a try-on table-mirror, tray and lighting-are ordinary on their own, but together they form a complete try-on experience. Unfortunately, many stores set them up poorly: mirrors at the wrong angle force customers to tilt their heads; trays packed with goods make elbows collide; overhead spotlights create harsh reflections in customers' eyes. Perceived product value drops on the spot. Staging a try-on table is essentially redistributing space around the action of "sitting down to look in the mirror": the mirror sets the viewing distance, the tray sets the hand position, and the lighting sets the truth.
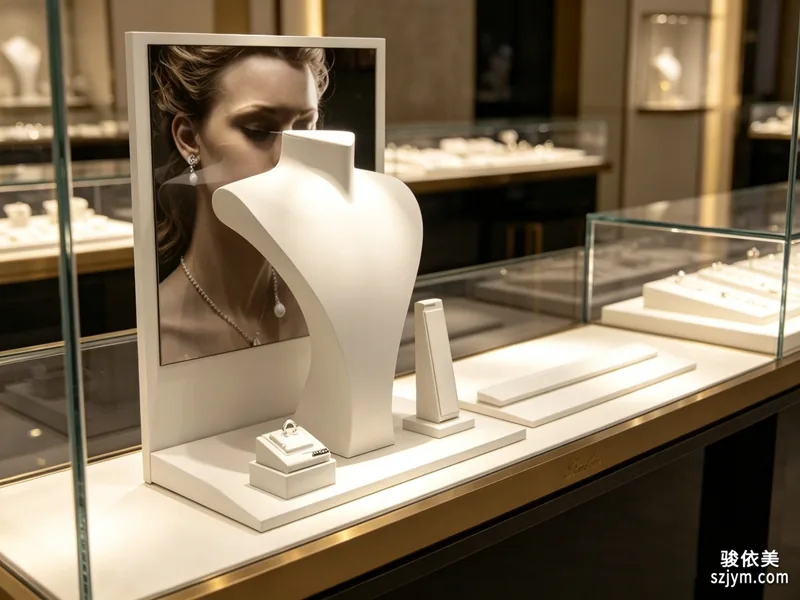
The mirror comes first: decide where the customer will look. The mirror on a try-on table is not decoration; it is the customer's first reference for whether the piece suits them. A distance of 35 to 45 centimeters is right: too close and only part of the piece is visible, too far and details blur. The mirror should cover from the collar to the collarbone, so necklaces, pendants and earrings all stay in view. As for angle, tilt the mirror back about five to eight degrees, letting the customer see neck and collarbone at a natural eye level rather than the ceiling, while directing light toward the face. A common mistake is laying the mirror flat; customers then bow their heads, their necks stretch forward, and the drape of a necklace changes, distorting the result. Stand the mirror up at the right height, let the customer sit relaxed, and they see a true picture-and are far more likely to say "this is the one."
The tray decides the hand position. Where customers take goods from and put them down determines whether the process feels smooth. Two trays should be ready: a deep velvet-lined one for pieces being tried on, and a shallow one for pieces just removed, placed on each side with open space in the middle for the customer's hands. The deep tray needs a non-slip velvet or flocked lining so rings and earrings sit securely; the shallow tray should be small but lightly compartmented to keep necklaces from tangling with rings. Position the trays ten to fifteen centimeters lower than the mirror's sightline, so customers can reach items without shifting their bodies much and staff can pass pieces easily. A special note: keep only three to five pieces on the table at a time and store the rest in a spare tray nearby, replenishing one-for-one, so the surface always stays clean and the customer never faces a cluttered table.
Lighting determines whether the customer sees the truth. Two mistakes are common: relying only on ceiling downlights, which cast hard shadows under hands and create glaring highlights, and choosing color temperatures that distort reality-blue diamonds, white gold-leaving customers worried that the piece will not look the same at home. The right setup places the main light roughly 45 degrees from the front, aimed between the goods and the mirror, so light falls on the piece first and reflects into the customer's eyes-natural fire and color. A fill light from the rear side removes shadows under the chin and neck. A color temperature around 3500 to 4500K is the safest range; for warmer gold or cooler diamonds, tilt the lamp slightly rather than changing the whole strip. When the lighting is right, what customers see on the table matches daily wear, and their judgment that "it looks good on" holds up.
Execution follows a simple checklist. First, sit down and check from the customer's viewpoint: the chair should align with the counter's lower edge, and the seated eye level should meet the mirror's upper edge. Second, map the relationship among mirror, tray and lighting so that "the customer's line of sight-piece-light source" forms a smooth path, with pieces illuminated in the mirror rather than reflecting glare. Third, walk through the full try-on flow-take, pass, mirror, return-and adjust any step that requires standing, reaching or turning. Fourth, at closing time, return trays to their places and wipe the mirror clean, so dust and fingerprints do not degrade the next day's experience. These four steps take half an hour yet directly change how customers judge quality-an excellent return on effort.
The ultimate goal of staging the try-on table is to make the act of looking in the mirror natural, accurate and comfortable. The mirror sets the distance, the tray sets the hand position, and the lighting sets the truth; when the three work together, every minute a customer spends trying on adds to the sale. Before your next business day, take half an hour and reset your try-on table with this method: stand the mirror up, divide the trays, and set lighting at 45 degrees from the front. You will notice customers linger longer and put down rings more slowly-often a prelude to purchase. Display props are not about quantity; they are about being placed in the right spot.试戴是珠宝柜台前最关键的几分钟。客人坐下来,拿起戒指、项链或耳钉,在镜前比划两下,这短短几分钟往往决定成交还是放下。试戴台上最常用的三样道具——镜子、托盘、灯光,单独看都很普通,放在一起才构成完整的试戴体验。可惜很多店的试戴台是这样布置的:镜子角度不对,客人要歪着头照;托盘堆满货品,取放时手肘打架;灯光从头顶直射,戒指的反射点晃得人睁不开眼。产品价值感当场打折。试戴台的布局,本质是围绕"客人坐下来照镜子"这个动作重新分配空间:镜子定距离,托盘定手位,灯光定真相。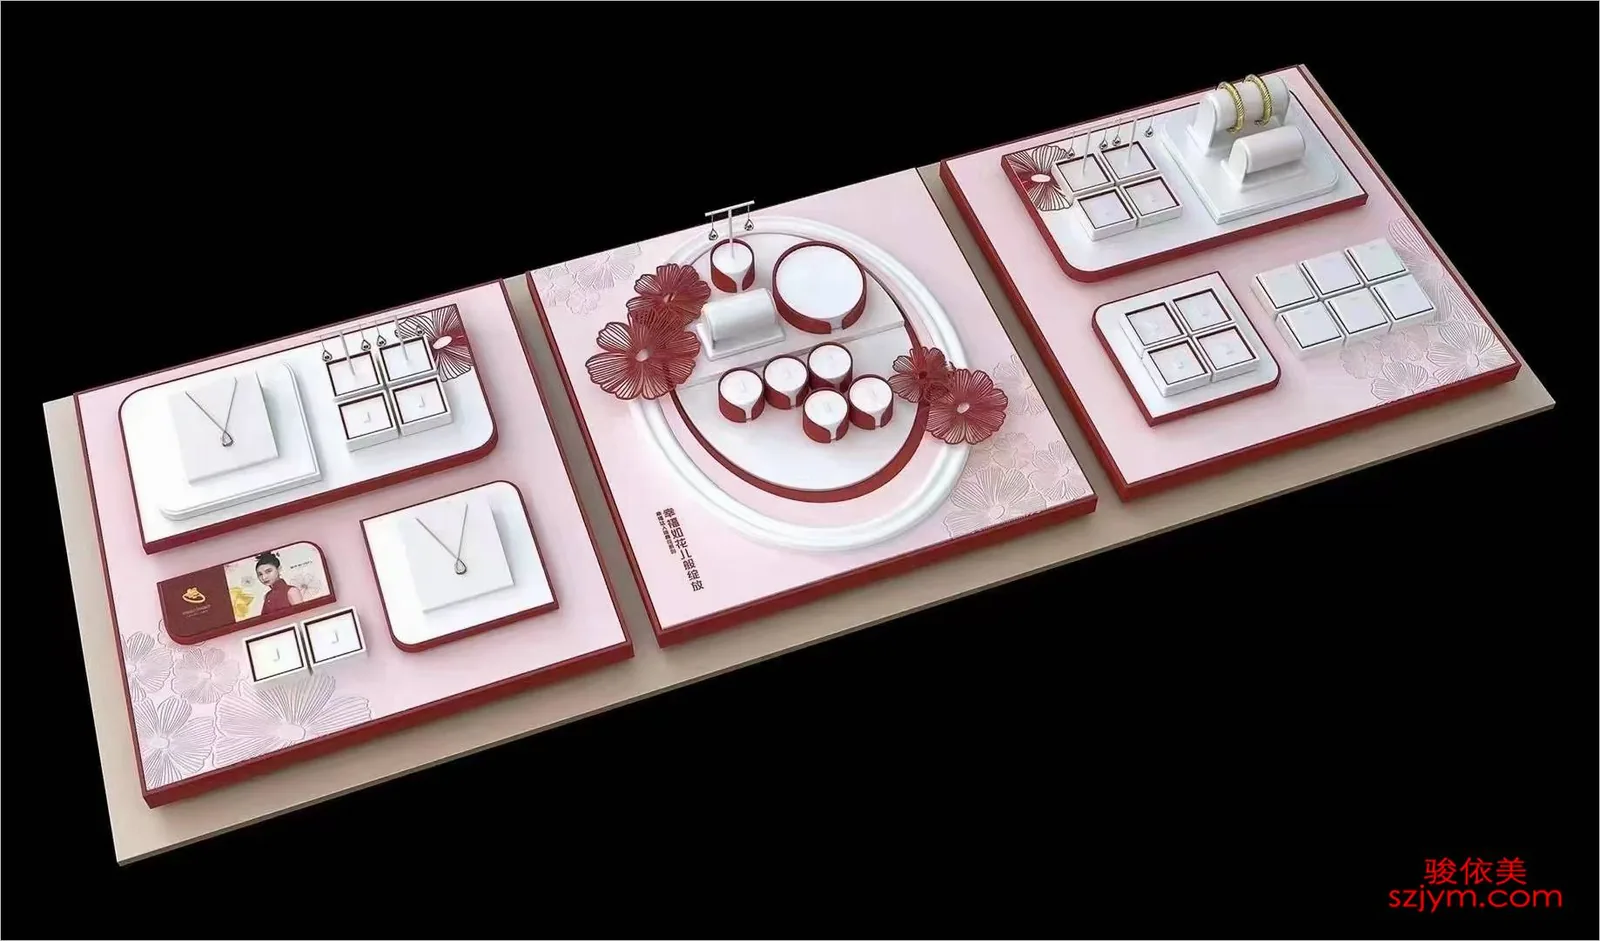 镜子先定"看的位置"。试戴台的镜子不是装饰品,而是客人判断适不适合的第一参考。镜子离人脸的距离以35到45厘米为宜:太近只能照到局部,项链吊坠看不全;太远则细节模糊,客人要凑近去认。镜面高度要覆盖领口到锁骨这一段,项链、吊坠、耳饰都能收进视野。角度上,镜面微微后倾五到八度,让客人平视时正好看到脖子和领口,而不是天花板,同时把光线引向面部。销售常犯的错是把镜子平放在台面上,客人要低头弯腰去照,脖子前伸,项链自然下垂的角度也跟着变了,试戴效果失真。把镜子立起来、调到合适高度,客人坐姿放松,看到的才是佩戴后的真实样子,点头说"就它了"的概率也会高一些。
托盘决定"放的手位"。客人的手从哪拿货、往哪放,直接影响取放顺不顺。试戴台上应同时备两只托盘:一只绒面深托放"正在试"的货,一只浅托放"已取下"的货,两只盘分居左右,中间留出客人伸手的空间。深托要防滑,植绒或绒布内衬能让戒指、耳钉稳稳嵌住,不随手滑动;浅托不必大,但要有简单分区,避免项链和戒指缠绕在一起。托盘的高度要略低于镜面视线十到十五厘米,客人低头取放时不用大幅挪动身体,销售也方便递接。特别提醒:台上最多留三到五件在试,其余放在旁侧的备用盘里,取一件补一件,台面永远保持清爽,客人不会对着满台货品不知所措。
 灯光管"看得真不真"。试戴台的光源常见两个误区:一是只用顶部筒灯,光从正上方打下来,戒指、手镯在客人手上形成硬阴影,高光点刺眼;二是色温偏离实际场景,把钻石照得发蓝、把黄金照得发白,客人担心"回家就不是这个颜色了"。正确做法是主光从斜前方约45度打向货品与镜面之间,让光先落在货上再反射进客人眼里,货品的火彩和颜色都真实自然;再用一盏辅助光从侧后方补上来,消除下巴和颈部的阴影。色温控制在3500到4500K之间最稳妥,金饰想要偏暖、钻石想要偏冷时,用小角度转动灯具微调,而不是整条换灯带。灯光调好后,试戴台上的货与日常佩戴环境所见一致,客人"戴得好看"的判断才站得住脚。试戴台的光源常见两个误区:
落地时按一套清单微调。第一步,坐下来用客人的视角检查:椅子高度与柜台下沿齐平,坐下来眼睛的高度正对镜子上沿;第二步,把镜子、托盘、灯光三者的关系画出来,让"客人的视线—货品—光源"连成一条顺畅的折线,保证货品在镜中被照亮而不是反光;第三步,完整走一遍试戴流程:取货、递盘、照镜、放下,感受哪个环节需要起身、够手或扭头,逐项调整;第四步,每天打烊后把托盘归位、镜面擦净,防止粉尘和指纹让第二天的试戴效果打折。这四步半小时就能完成,却直接改变客人对货品质感的主观判断,投入产出比极高。
试戴台布局的最终目的,是让"照镜子"这件事变得自然、准确、舒服。镜子给定距离,托盘给出手位,灯光给出真相,三样道具配合到位,客人试戴的每一分钟都在为成交加分。下次营业前,抽出半小时,按这套方法重摆一次试戴台:把镜子立起来,把托盘分好区,把灯光调到斜前45度。你会发现,客人停留的时间变长了,放下戒指的动作变慢了——这往往是下单的前奏。陈列道具不在多,在于摆对地方。
The mirror comes first: decide where the customer will look. The mirror on a try-on table is not decoration; it is the customer's first reference for whether the piece suits them. A distance of 35 to 45 centimeters is right: too close and only part of the piece is visible, too far and details blur. The mirror should cover from the collar to the collarbone, so necklaces, pendants and earrings all stay in view. As for angle, tilt the mirror back about five to eight degrees, letting the customer see neck and collarbone at a natural eye level rather than the ceiling, while directing light toward the face. A common mistake is laying the mirror flat; customers then bow their heads, their necks stretch forward, and the drape of a necklace changes, distorting the result. Stand the mirror up at the right height, let the customer sit relaxed, and they see a true picture-and are far more likely to say "this is the one."
The tray decides the hand position. Where customers take goods from and put them down determines whether the process feels smooth. Two trays should be ready: a deep velvet-lined one for pieces being tried on, and a shallow one for pieces just removed, placed on each side with open space in the middle for the customer's hands. The deep tray needs a non-slip velvet or flocked lining so rings and earrings sit securely; the shallow tray should be small but lightly compartmented to keep necklaces from tangling with rings. Position the trays ten to fifteen centimeters lower than the mirror's sightline, so customers can reach items without shifting their bodies much and staff can pass pieces easily. A special note: keep only three to five pieces on the table at a time and store the rest in a spare tray nearby, replenishing one-for-one, so the surface always stays clean and the customer never faces a cluttered table.
Lighting determines whether the customer sees the truth. Two mistakes are common: relying only on ceiling downlights, which cast hard shadows under hands and create glaring highlights, and choosing color temperatures that distort reality-blue diamonds, white gold-leaving customers worried that the piece will not look the same at home. The right setup places the main light roughly 45 degrees from the front, aimed between the goods and the mirror, so light falls on the piece first and reflects into the customer's eyes-natural fire and color. A fill light from the rear side removes shadows under the chin and neck. A color temperature around 3500 to 4500K is the safest range; for warmer gold or cooler diamonds, tilt the lamp slightly rather than changing the whole strip. When the lighting is right, what customers see on the table matches daily wear, and their judgment that "it looks good on" holds up.
Execution follows a simple checklist. First, sit down and check from the customer's viewpoint: the chair should align with the counter's lower edge, and the seated eye level should meet the mirror's upper edge. Second, map the relationship among mirror, tray and lighting so that "the customer's line of sight-piece-light source" forms a smooth path, with pieces illuminated in the mirror rather than reflecting glare. Third, walk through the full try-on flow-take, pass, mirror, return-and adjust any step that requires standing, reaching or turning. Fourth, at closing time, return trays to their places and wipe the mirror clean, so dust and fingerprints do not degrade the next day's experience. These four steps take half an hour yet directly change how customers judge quality-an excellent return on effort.
The ultimate goal of staging the try-on table is to make the act of looking in the mirror natural, accurate and comfortable. The mirror sets the distance, the tray sets the hand position, and the lighting sets the truth; when the three work together, every minute a customer spends trying on adds to the sale. Before your next business day, take half an hour and reset your try-on table with this method: stand the mirror up, divide the trays, and set lighting at 45 degrees from the front. You will notice customers linger longer and put down rings more slowly-often a prelude to purchase. Display props are not about quantity; they are about being placed in the right spot.试戴是珠宝柜台前最关键的几分钟。客人坐下来,拿起戒指、项链或耳钉,在镜前比划两下,这短短几分钟往往决定成交还是放下。试戴台上最常用的三样道具——镜子、托盘、灯光,单独看都很普通,放在一起才构成完整的试戴体验。可惜很多店的试戴台是这样布置的:镜子角度不对,客人要歪着头照;托盘堆满货品,取放时手肘打架;灯光从头顶直射,戒指的反射点晃得人睁不开眼。产品价值感当场打折。试戴台的布局,本质是围绕"客人坐下来照镜子"这个动作重新分配空间:镜子定距离,托盘定手位,灯光定真相。
镜子先定"看的位置"。试戴台的镜子不是装饰品,而是客人判断适不适合的第一参考。镜子离人脸的距离以35到45厘米为宜:太近只能照到局部,项链吊坠看不全;太远则细节模糊,客人要凑近去认。镜面高度要覆盖领口到锁骨这一段,项链、吊坠、耳饰都能收进视野。角度上,镜面微微后倾五到八度,让客人平视时正好看到脖子和领口,而不是天花板,同时把光线引向面部。销售常犯的错是把镜子平放在台面上,客人要低头弯腰去照,脖子前伸,项链自然下垂的角度也跟着变了,试戴效果失真。把镜子立起来、调到合适高度,客人坐姿放松,看到的才是佩戴后的真实样子,点头说"就它了"的概率也会高一些。
托盘决定"放的手位"。客人的手从哪拿货、往哪放,直接影响取放顺不顺。试戴台上应同时备两只托盘:一只绒面深托放"正在试"的货,一只浅托放"已取下"的货,两只盘分居左右,中间留出客人伸手的空间。深托要防滑,植绒或绒布内衬能让戒指、耳钉稳稳嵌住,不随手滑动;浅托不必大,但要有简单分区,避免项链和戒指缠绕在一起。托盘的高度要略低于镜面视线十到十五厘米,客人低头取放时不用大幅挪动身体,销售也方便递接。特别提醒:台上最多留三到五件在试,其余放在旁侧的备用盘里,取一件补一件,台面永远保持清爽,客人不会对着满台货品不知所措。
灯光管"看得真不真"。试戴台的光源常见两个误区:一是只用顶部筒灯,光从正上方打下来,戒指、手镯在客人手上形成硬阴影,高光点刺眼;二是色温偏离实际场景,把钻石照得发蓝、把黄金照得发白,客人担心"回家就不是这个颜色了"。正确做法是主光从斜前方约45度打向货品与镜面之间,让光先落在货上再反射进客人眼里,货品的火彩和颜色都真实自然;再用一盏辅助光从侧后方补上来,消除下巴和颈部的阴影。色温控制在3500到4500K之间最稳妥,金饰想要偏暖、钻石想要偏冷时,用小角度转动灯具微调,而不是整条换灯带。灯光调好后,试戴台上的货与日常佩戴环境所见一致,客人"戴得好看"的判断才站得住脚。试戴台的光源常见两个误区:
落地时按一套清单微调。第一步,坐下来用客人的视角检查:椅子高度与柜台下沿齐平,坐下来眼睛的高度正对镜子上沿;第二步,把镜子、托盘、灯光三者的关系画出来,让"客人的视线—货品—光源"连成一条顺畅的折线,保证货品在镜中被照亮而不是反光;第三步,完整走一遍试戴流程:取货、递盘、照镜、放下,感受哪个环节需要起身、够手或扭头,逐项调整;第四步,每天打烊后把托盘归位、镜面擦净,防止粉尘和指纹让第二天的试戴效果打折。这四步半小时就能完成,却直接改变客人对货品质感的主观判断,投入产出比极高。
试戴台布局的最终目的,是让"照镜子"这件事变得自然、准确、舒服。镜子给定距离,托盘给出手位,灯光给出真相,三样道具配合到位,客人试戴的每一分钟都在为成交加分。下次营业前,抽出半小时,按这套方法重摆一次试戴台:把镜子立起来,把托盘分好区,把灯光调到斜前45度。你会发现,客人停留的时间变长了,放下戒指的动作变慢了——这往往是下单的前奏。陈列道具不在多,在于摆对地方。